QuickStart

YoBulk is a platform for exchanging data between businesses.
For an end user,YoBulk is a data importer which accept CSV and allow them to quickly fix data errors in a spreadsheet view.
And to your developers and customer sucess team, YoBulk is a powerful data engine that can be configured to accept, transform, and validate data through templates.
If you want to explore quick CSV data import functionalty with a pre-configured template then please checkout this demo. YoBulk auto create a template and Import button during first time installation and user can validate a CSV in 3 quick step
- Step 1:Download a CSV with some error.
- Step 2:Upload the CSV against a pre-configured template and make the error corrections.
- Step 3:Import the corrected CSV data to MongoDB.

Importer Button creation flow by Developers and Customer Sucess team members who onboard data:
YoBulk enables you to create an import request button.You can embedded this button in you app or SaaS where your users can upload their data. Developers or data onboarding team members can create import buttons to onboard customer data.
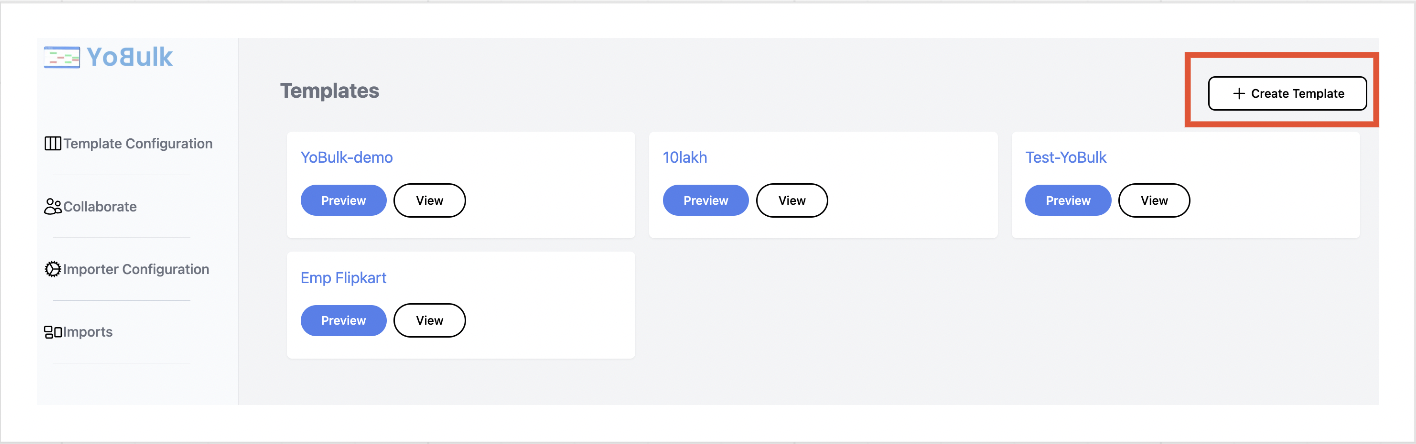
Step 1:Define a schema/template with columns validation rules for your importer:
Go to Template configuration section.Either use nocode template builder or json editor to create a template.CSV template option can be used if you want to create a template from an existing CSV.
A Template ID will be created post sucessfull registration of a template. Go to template section Templete Creation for a detail explaination on template creation process.
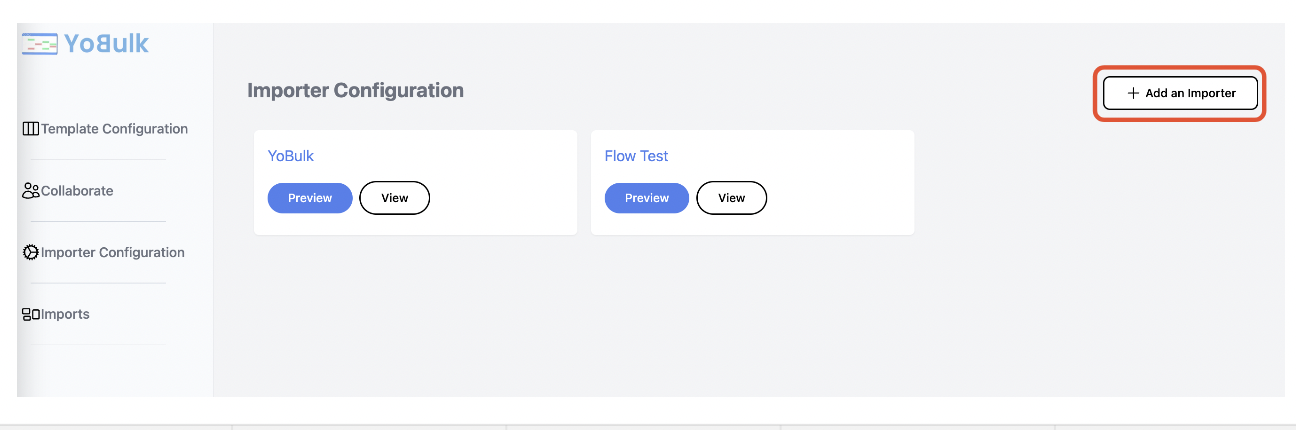
Step 2:Create an Importer button.
Go to Importer configuration and create an Import button by providing a name and attaching it to a template. Attaching a workspace and Org to an importer is optional for now.
A react code snippet is generated, which can be copied and used in your SaaS or application.
Step 3:Test your Import button functionality.
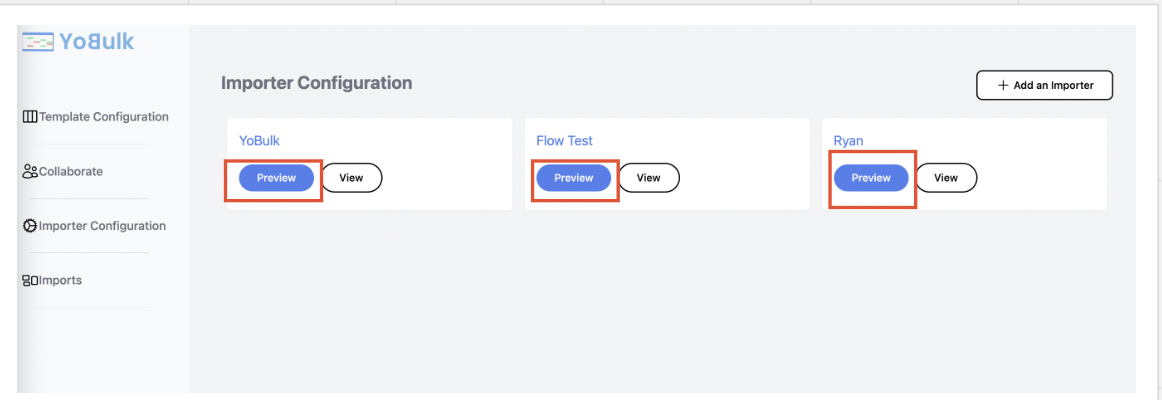
Go to Importer configuration section,Your import button will be listed in the dashboard.
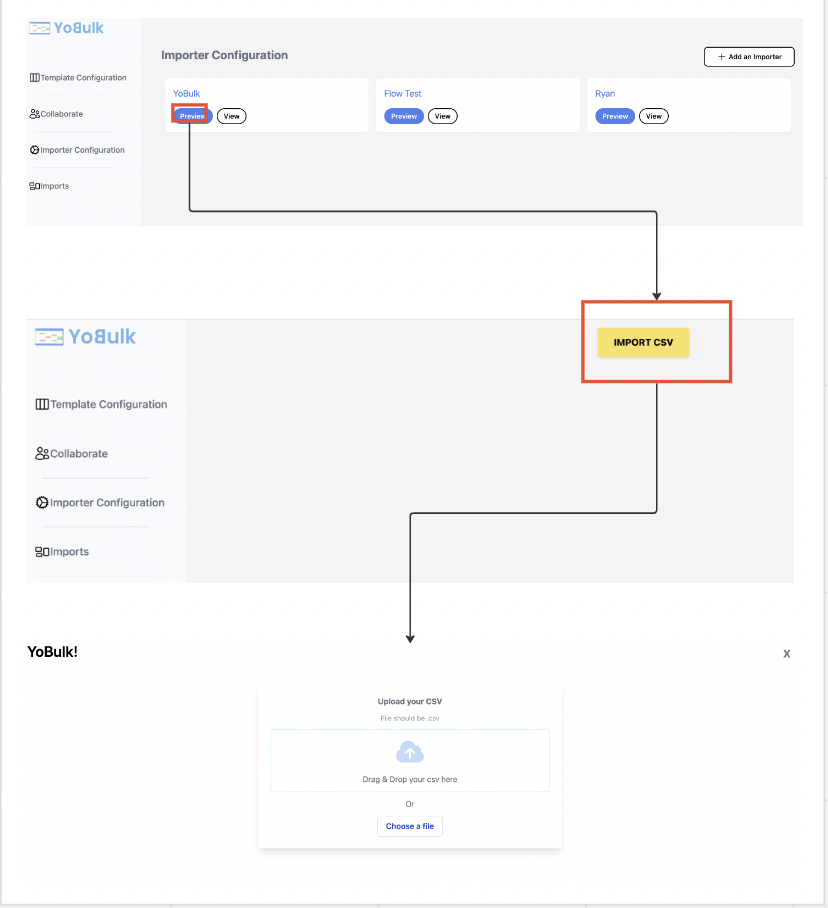
Click preview button, it will start a workflow for your enduser to upload a csv.
CSV error correction worflow by end user or customer who uploads data:
Step 1:Upload CSV
User clicks the import button shared by data receiver.User drops a CSV with in the uploader.
Step 2:Match columns
User/Data donor matches the uploaded CSV columns with the template columns programmed by the data receiver.
Info 1: User can manually do the matching or use YoBulk's auto matching AI solution. Column or fields not selected by the user will not be imported.

Step 3:Fix issues
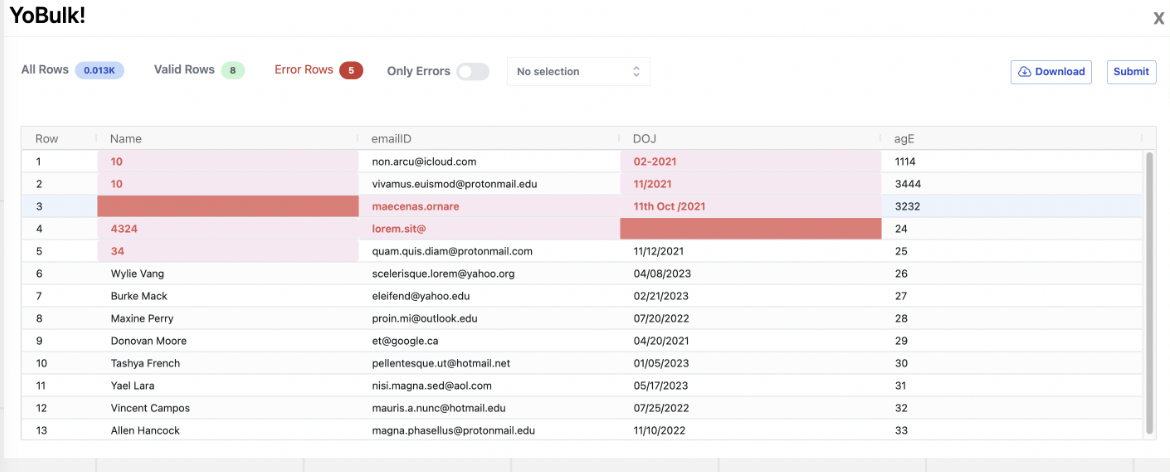
The errors will be shown to the user against the template validation rules set by the data receiver.
user reviews the data and fixes the validation error in a spreadsheet view.
User can click submit button to import all CSV data.